When the body encounters the electric field pressure of the Spooky2 feedback scan, it changes its own electric field through the autonomic nervous system, resulting in changes in skin conductivity, heart rate and electrical signal behavior. After the Spooky2 biofeedback scan is completed, it is saved as a frequency list , to deal with the imbalanced energy frequencies in your body later. Spooky2 has two devices for biofeedback scanning: Spooky2 Pulse and Spooky2 Generator-X.
Using Spooky Pulse
There are three types of scans in Spooky2 Generator-X, namely GX TENS Scan (using TENS pad), Sample Scan (using Sample Digitizer) and Scalar Scan (using Spooky2 Scalar). Scans from the Spooky2 Generator-X record changes in the electrical signal, and if there is a frequency in your body that resonates with the pathogen, a subtle change in the electrical pattern will indicate a hit was detected and will be recorded in the scan.
Using Spooky Generator-X
There are three types of scans in Spooky2 Generator-X, namely GX TENS Scan (using TENS pad), Sample Scan (using Sample Digitizer) and Scalar Scan (using Spooky2 Scalar). Scans from the Spooky2 Generator-X record changes in the electrical signal, and if there is a frequency in your body that resonates with the pathogen, a subtle change in the electrical pattern will indicate a hit was detected and will be recorded in the scan.
Step 1: Save to database
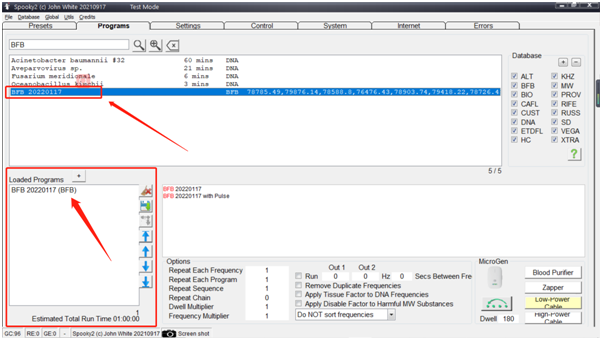
- 1. After the scan is complete, a window will pop up showing the scan results, click the Save button and save your scan results as a program.

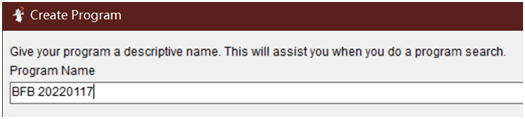
- 2. Give your scan a name to make it easier for you to search, the default name is “BFB_the date”.
- 3. You will see the frequency entered in the frequency field/square.
- 4. If you wish, you can enter text in the program description, the default description is your scan time.
- 5. Click the Save button in the upper right corner of the window, and when it asks if you are sure you want to save and exit, click Yes.
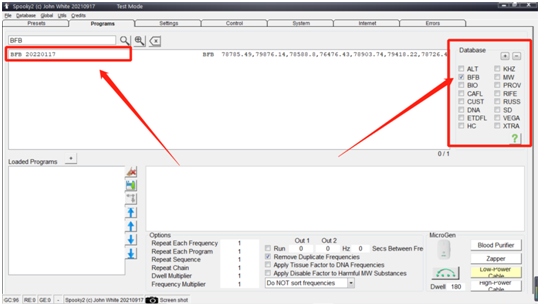
- 6. Then you can go to the Programs tab, just tick the program of “BFB” and view the scan result.
STEP 2: RUN THE SCAN RESULTS – You can start running your biofeedback scan results directly after the scan.
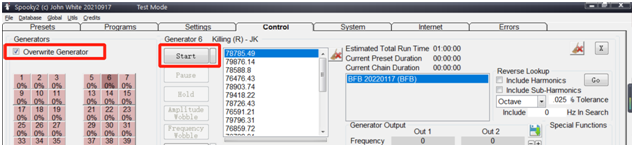
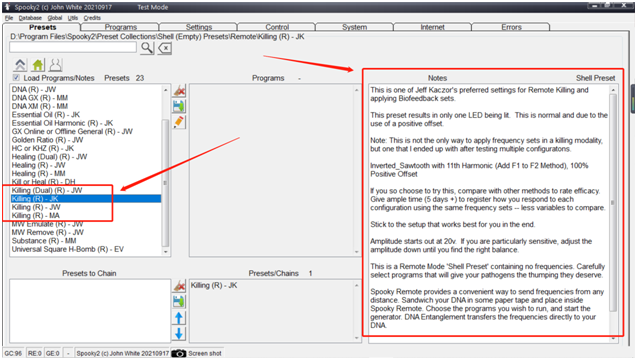
- 1. Under the Presets tab, select the Empty-Shell preset, select the transport mode (contact, remote, plasma) and the “Killing” preset, please read the instructions on the right to select The preset that works best for you. For plasma mode, you can use the Spooky Plasma Advanced (P)–JW preset.
- 2. Go to the Programs tab, search for the “BFB…” name of the scan result and double click to select it, you will see the name of the scan in the loaded program pane.
- 3. Go to the control tab, tick “Overwritten”, click the generator button, then press start, the runtime channel button will turn green.